
Duck in Town - A Rising Knight
How to make an stylized fire shader
I know what you're thinking: another fire shader tutorial? While it is true that there are tons of examples online, I think most of them fail at explaning what does the code actually do. So, let's see how this toon, stylized, whatever-you-wanna-call-it fire shader works in Duck in Town!
First, let's see the final product, in a torch inside the amazing Duck Guild of Town:

And some experimenting:

(I know, that gif quality sucks, but you get the idea)
So, let's start!
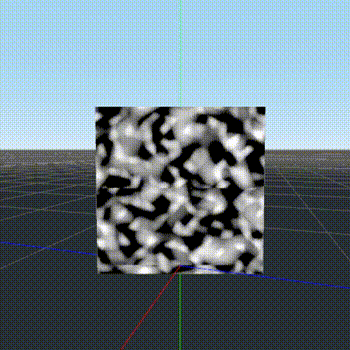
Create a new MeshInstance, set its mesh to a QuadMesh (if you're not using Godot Engine, just create a 3D plane however it is done on your engine) and let's assign it a new shader!
First, let's set the shader type and render modes:
shader_type spatial;
render_mode unshaded, cull_disabled;
The unshaded mode is to make sure our fire isn't affected by other lighting (in some cases you might want that, but we're aiming to that toon style so lighting is usually simple and plain). The culling is also disabled to make sure your plane looks fine from every point in your game.
After setting this, we need to define the uniforms:
uniform sampler2D fire_tex_1 : hint_albedo;
uniform sampler2D fire_tex_2 : hint_albedo;
uniform sampler2D fire_mask : hint_albedo;
uniform vec4 inner_color : hint_color;
uniform vec4 outer_color : hint_color;
The first two uniforms are just noise textures. You can try different noise types and parameters. I made these with GIMP's noise tools: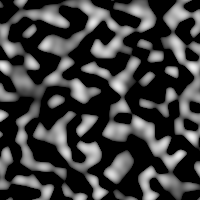
These textures will define how your flame looks, so tweak them as you please! But, first let's continue writing our shader. The next uniform is a mask that will define the flame shape. I'm using this texture: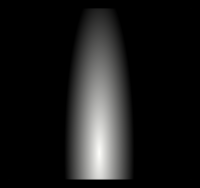
This will define the intensity of the flame as well as its shape: the whiter, the more intense it is. Because of this, the black zones will just look empty.
After this, we have two colors with pretty much self-explanatory names. These will define the color of our flames. Since it is a toon fire, I'm only using two colors, but of course you could use more colors or even a color texture!
Now, let's see the shader stages. While most of the magic will happen in the fragment shader, we have something to set in the vertex shader: billboarding. In this case we will use Y-Billboard, meaning our flame will always look to the camera, but locked on the Y-axis (to make sure our fire doesn't fly!)
Add these two lines to your vertex shader:
void vertex() {
    MODELVIEW_MATRIX = INV_CAMERA_MATRIX * mat4(CAMERA_MATRIX[0],WORLD_MATRIX[1],vec4(normalize(cross(CAMERA_MATRIX[0].xyz,WORLD_MATRIX[1].xyz)), 0.0),WORLD_MATRIX[3]);
    MODELVIEW_MATRIX = MODELVIEW_MATRIX * mat4(vec4(1.0, 0.0, 0.0, 0.0),vec4(0.0, 1.0/length(WORLD_MATRIX[1].xyz), 0.0, 0.0), vec4(0.0, 0.0, 1.0, 0.0),vec4(0.0, 0.0, 0.0 ,1.0));
}
I could explain the meaning of these lines, but some math is required, so let's just copy and paste for now. (You can learn the basics about billboards here).
Now, let's get onto the important part: the fragment shader. This is where magic will happen!
First, let's sample our textures:
    vec3 noise_1 = texture(fire_tex_1, vec2(UV.x, UV.y + TIME * 0.7)).rgb;
    vec3 noise_2 = texture(fire_tex_2, vec2(UV.x, UV.y + TIME * 1.2)).rgb;
    vec3 mask = texture(fire_mask, UV).rgb;
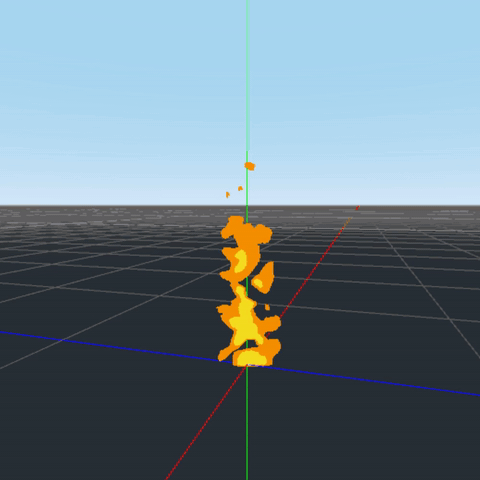
While we are sampling the mask the classic way (just using the mesh''s UVs), for the noise textures we are adding TIME to the UVs' Y coordinate, meaning the texture will pan along this axis. Feel free to change the multiplier for TIME, in case you want it to be slower or faster. If we set the addition of these two noise textures to the ALBEDO (essentially, the final color), (noise_1 + noise_2) you should see something like this:
(Again, sorry for the gif quality)
If you then multiply the mask's value to this addition (so you have (noise_1+noise_2)*mask)) you get something like this:

Looks familiar, right? We are almost there! Now we need to use our colors and to get rid of that weird black. Let's see the code before explaining it (and take your time to understand it before reading the explanation, that's how one learns!)
    vec3 col = (noise_1 + noise_2) * mask;
    ALBEDO = vec3(step(0.015, col.r));
    ALBEDO *= mix(outer_color.rgb, inner_color.rgb, step(0.15, col.r));
    ALPHA = step(0.015, col.r);
The col variable just holds the noise and mask, just how we've seen earlier. Next, we have the first ALBEDO value: an step function. What this line does is to return 0 if the col.r value is lesser than 0.015, and 1 otherwise. This hard step is needed for that characteristic stylized look: notice how there are only hard edges. As always, you can tweak these values until you get something cool! Notice how it is inside a vec3 -- that's just because that's the type that ALBEDO expects. Using only one argument means the three components in this vector will have the same value (that's ok for us, we are going to add colors after). Now you have your flame only in white and with an awful black background: let's add some color.
We multiply the previous ALBEDO value by a mix function. What this function does is to mix two vectors (in this case, two colors) depending on a value (the third argument). In this case, we are using an step as a mix-value, meaning it will only return 0 or 1, so the mix will only return one color or the another (so, there isn't any mixing actually happening here). This is a pattern commonly used in shaders, to avoid using if-else structures (GPUs don't like those). The 0.15 in the step is how big the inner color (the more intense part in our fire) will be. Again, tweak this value as you wish.
There's only one thing left: to get rid of that awful black background! This is actually quite easy. Just using the same step value as we used before, we set the alpha to 1 (max opacity) to any pixel whose greyscale value is greater than 0.015, meaning all the black or almost-black parts will be transparent.
Hopefully that explanation was clearer enough? Most shaders use similar patterns, so it is important that you fully understand this. If you have any doubt leave a comment and I'll try to help you!
After writing the shader, you should have your mesh looking like an amazing stylized toon fire, like this one:
Now there's only one thing left: you may have noticed in the gif at the start of the tutorial that there's actual flickering light coming from the fire. To do this, just add an SpotLight node as a child to your mesh! For the flickering, add an AnimationPlayer and make a simple, long anim (10-15 secs) with random flickering changing the light's intensity, and set the animation to autoplay. This is where Godot Engine's node-scene system really shines: you can save this tree as an independent scene and instance it as an individual object wherever you want some cool fire!
Remember to experiment with the shader parameters - try different textures, colors, or step/mix values, you might be surprised how things change just randomly changing params!
Duck in Town - A Rising Knight releases in 2019, we'd love to be on your collections in itch.io and in your wishlists on Steam! For any question, feel free to leave a comment or ask me on Twitter (@_atorresm).
Comments
Log in with itch.io to leave a comment.
hey, awesome material, just wanted to let you know the gifs are missing
Oh, sorry :( reuploaded them, thanks for the heads up!
Thanks! It's really cool how you explain everything from the ground up without getting too complicated the way you did - great tut! But you might want to mention that two-functions thing explicitly for all of us total noobs reading your post.
That's true! However, I recommmend reading the official docs' introduction instead :)
You refer to a 'vertex shader' and 'fragment shader' but we only appear to be editing a single shader. What am I missing?
In Godot, you have both stages in the same file. The vertex shader goes inside the vertex() function and the fragment shader inside the fragment() function.